
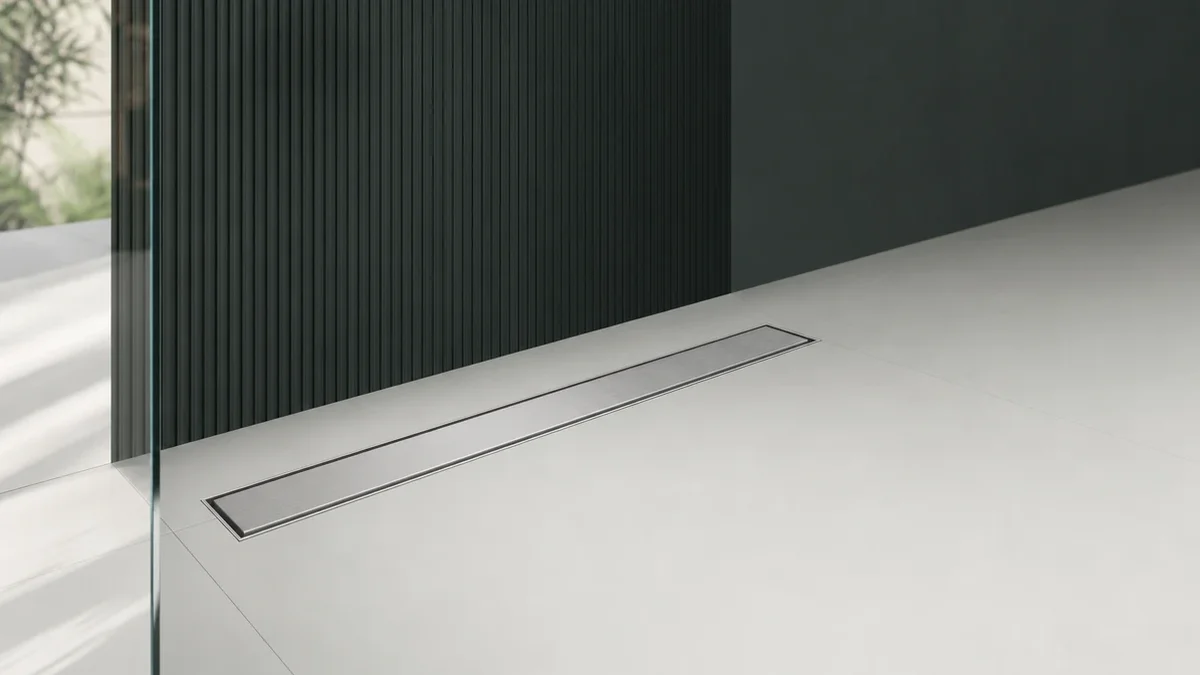
Linear Shower Drains: Sizing, Slope and Installation - Selection Guide
A linear shower drain looks simple: a stainless channel, a grate, one outlet. In practice it is the one fixture in a bathroom that forces three decisions at once - how long, where, and at what slope - and the wrong answer to any of them shows up later as ponding water, a cracked tile line or a leak under the membrane. This guide walks through the full selection in the order a project actually runs: location, size, slope, body and outlet, grate, material, then installation.
New to floor drains? Start with the floor drain types, parts and applications guide. If you are still deciding between a linear and a point drain, read Linear vs Center Shower Drain first. This page assumes you have chosen linear and need to specify it.
The 60-Second Spec
| Decision | Default that works | Change it when |
|---|---|---|
| Location | Along the back wall, or across the threshold of a curbless entry | Large walk-in: consider a center ("island") run |
| Length | As long as the wall or opening it serves, within standard sizes | Tile or glass layout dictates a cut size |
| Slope | One plane toward the drain, about 2% (1/4 inch per foot) at the finished floor | Accessible showers: stay at or under the accessibility limit |
| Outlet | 2 inch (50 mm) outlet, position matched to the pipe | Floor depth or joist layout forces a side outlet |
| Grate | Slotted or tile-in, removable | Heavy commercial use: heavier plate or bar grate |
| Material | 304 stainless | Coastal, pool or chemical exposure: 316 |
Everything below explains why those defaults work and when to leave them.
Step 1: Choose the Location
Linear drains work because the floor only needs to fall in one direction. Where you put the channel decides which direction that is.
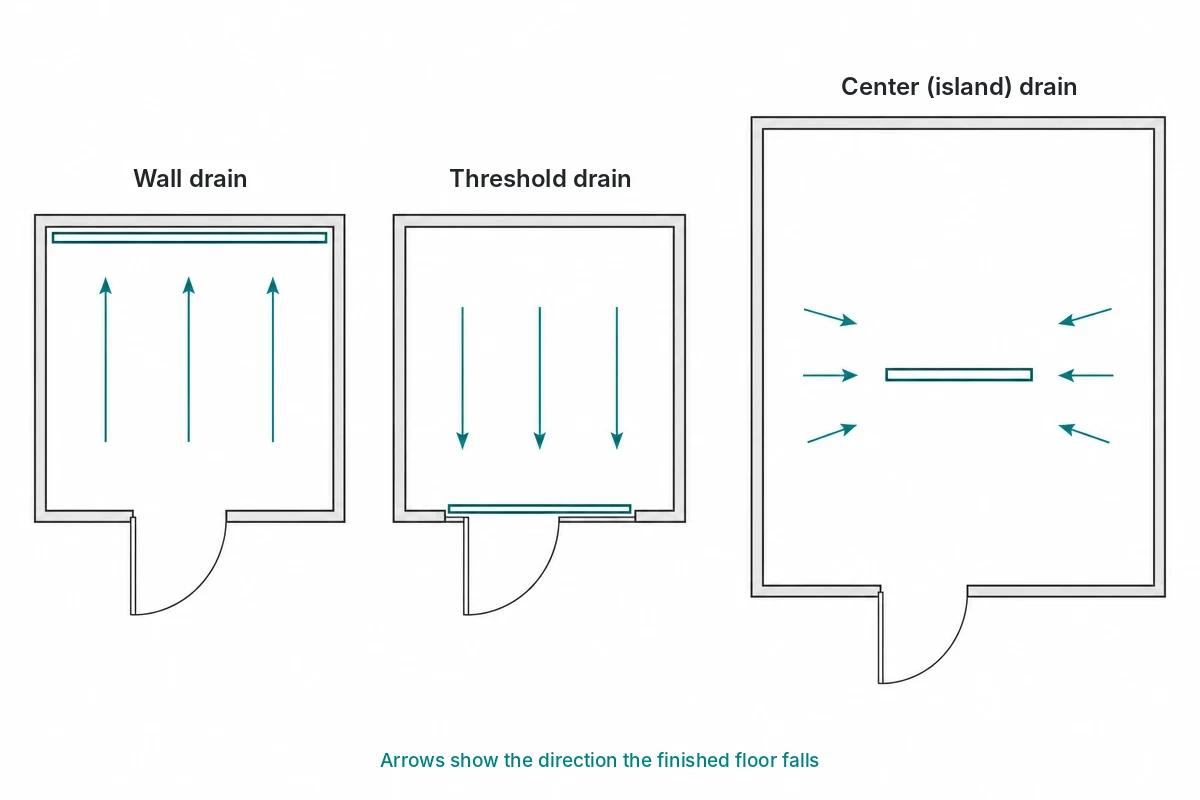
- Wall drain (along the back or side wall). The floor slopes from the entry toward the wall. Easiest to tile, easiest to clean, and the grate sits where nobody stands. The default for most residential showers.
- Threshold drain (across the entry). The drain sits at the shower opening and the floor slopes toward it, which keeps water inside and allows a curbless, flush entry. Best for barrier-free bathrooms, with one caution: the drain must be long enough to catch splash across the full opening.
- Center or island run. The floor slopes toward the middle from both sides. It suits large walk-in areas and wet rooms but needs more careful setting out - two slopes meeting at one channel - and a longer drain to carry the flow.
A practical rule: put the drain where water naturally wants to go, and put the longest tile run parallel to it. The channel then becomes part of the layout instead of an obstacle.
Step 2: Size It - Length, Width and Flow
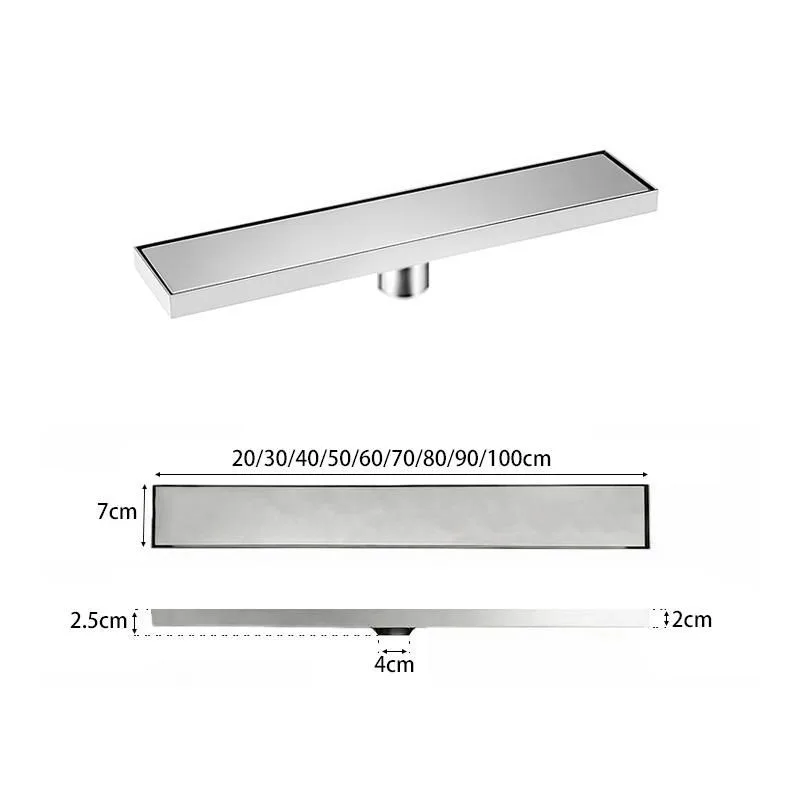
Length. For a wall or threshold drain, length follows the wall or opening it serves. Wider coverage means a more forgiving floor: water that lands anywhere along the entry still finds the channel. Standard linear drains are commonly made in lengths from about 300 mm to 1000 mm (12-40 inches), with custom lengths made to order. If you are trimming to fit a tile module, specify the length at order time rather than cutting the body on site.
Width and profile. Most shower channels are slim - the visible grate is typically 50-70 mm wide - which is why they disappear into a tile joint. Width limits grate options and the cleaning space under it, so do not go slimmer than the maintenance plan allows.
Flow check. US showerheads are limited to 2.5 gpm (about 9.5 L/min) each. A single head is no test for any linear drain; the problem is multi-head, rain-head and body-jet systems. Add the flows that can run at the same time:
| Shower setup | Typical simultaneous flow |
|---|---|
| One standard showerhead | about 2.5 gpm (9.5 L/min) |
| Head plus handheld | about 5 gpm (19 L/min) |
| Rain head plus three body jets | 10 gpm (38 L/min) or more |
Compare that total with the drain's rated flow at a stated water depth - ask for the test conditions, not just a headline number. When a drain's published capacity has no test method behind it, treat it as marketing. For the calculation method, see Linear Drain Flow Rate and Slope Calculation.
Step 3: Get the Slope Right
Slope is the part that fails in the field, and it fails because three different slopes get confused.
- The structural or screed slope under the membrane.
- The slope inside the channel, if the body is designed with one.
- The finished floor slope at the tile surface - the one the user and the inspector actually see.
For a linear drain the finished floor falls in one plane toward the channel. Typical US plumbing code language for residential shower floors asks for a fall between 1/4 inch and 1/2 inch per foot (2% to 4%) - confirm the version your jurisdiction has adopted. Accessible showers add an upper limit: roll-in shower floors are held to about 1:48 (just over 2%), so the workable window is narrow and needs to be set out carefully, not eyeballed.
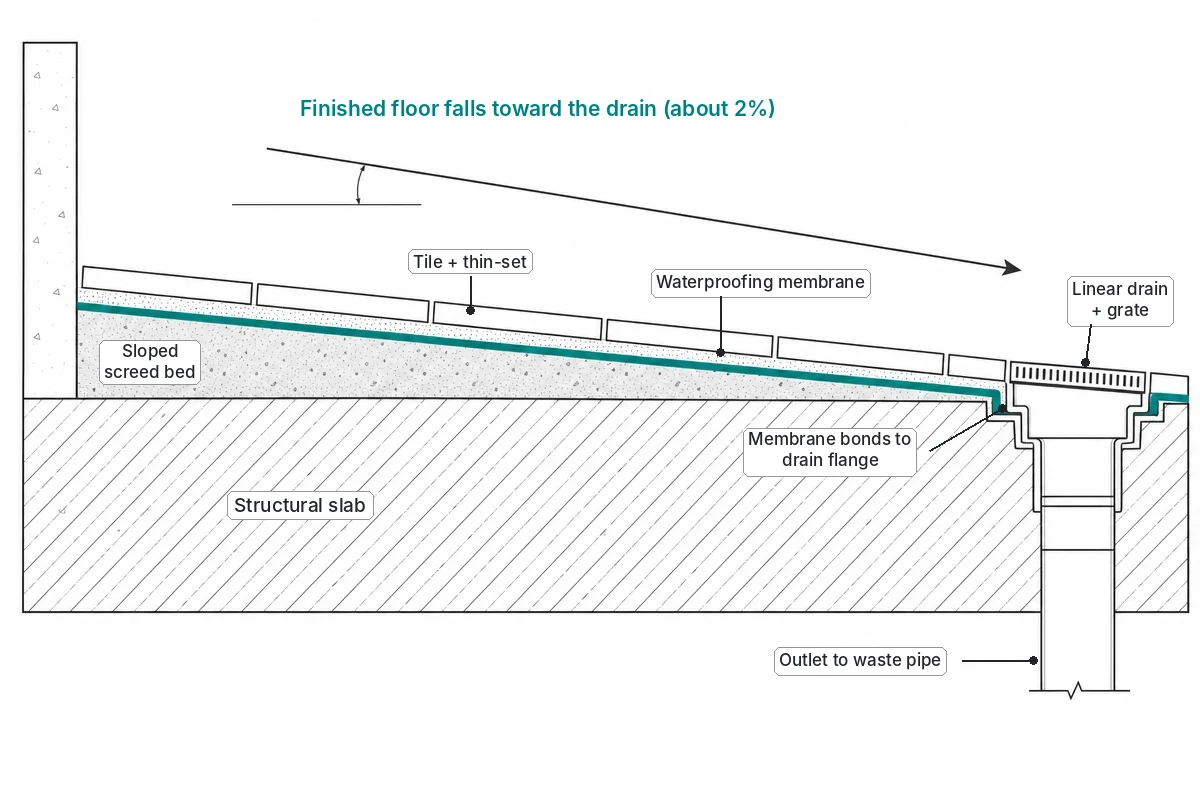
The arithmetic is simple. A 1,200 mm (4 ft) run from the far wall to the drain at 2% needs 24 mm (about 1 inch) of fall. Mark the drain-edge level first, then rise to the far wall - not the other way round - and check with a long straightedge before the membrane goes down.
Two failure modes to avoid:
- Slope towards the drain only on paper. If the setting bed is built flat and the tiler "pitches" the tile, the thin-set bed carries the slope and cracks.
- Mixing up screed slope with finish slope. The drawing may show a shallow fall in the screed and still end up too flat at the surface. Tile-In Linear Drain Detail explains how to read a reference drawing without copying a slope that belongs to a different layer.
Step 4: Body Depth, Outlet and Trap
Body depth must fit the floor build-up. The drain body, membrane flange, setting bed and finished tile all have to fit in the slab or subfloor. Measure the available depth before you order; a drain that is 20 mm too deep for a renovation is a floor-demolition problem, not a product problem.
Outlet position and size. Our standard linear drains use a 2 inch (50 mm) outlet, vertical or horizontal depending on the model. Choose centered or end outlet to match where the waste line actually exits - an end outlet saves a bend when the pipe runs along the wall, a center outlet balances flow on long runs. Decide this before ordering, not on site.
Trap and odor. The drain needs a water seal below it. Many models carry an integral seal (a 50 mm water seal on several of ours); where there is none, a P-trap goes below the slab. For showers that sit unused for weeks, the seal dries out and the room smells; see how floor drain water seals fail and how to protect them and our smart anti-odor traps.
Flange. A bonding flange is what lets the membrane tie into the drain. If your waterproofing system is sheet or liquid-applied, confirm the flange is compatible and that the membrane manufacturer allows the bond.
Step 5: Choose the Grate
The grate is what people see and touch, and it should be chosen for cleaning as much as for looks. See Linear Shower Drain Grate Styles for the full comparison. In short:
- Slotted grates (straight, offset, V-pattern, fine parallel slots) pass water fast and read as part of the tile layout. The wider the slot, the faster the flow and the easier the hair removal - and the more visible it is.
- Tile-in (insert) grates accept the floor tile in the grate frame so the drain nearly disappears. They look best and ask the most of the tiler: tile thickness, cut accuracy and adhesive depth all matter.
- Perforated or heavy-duty grates suit commercial and hospitality bathrooms where traffic and cleaning are rougher.
Whichever you choose, insist on a removable grate and a removable hair trap. A drain you cannot clean in thirty seconds is a drain you will rip out.
Step 6: Material and Finish
For stainless steel bodies and grates, 304 is the working standard for domestic and light-commercial showers, and 316 earns its premium in salt-air, pool or chemical-cleaning environments. We cover the trade-off in 304 vs 316 Stainless Steel Floor Drains. Brushed, polished, black and gold finishes are mostly appearance decisions - but coated or plated finishes (PVD) should be specified by finish and supplier process, not by color name alone.
Step 7: Installation Sequence
- Confirm the floor build-up against the drain body depth and outlet position.
- Set the drain at the correct level with the frame edge at the finished tile level, supported so it cannot move when the setting bed is placed.
- Connect the outlet and trap to the waste line and check the fall of the pipe.
- Place the setting bed in one plane toward the drain, using a long straightedge and a level to check it. This is where the slope is made.
- Apply the waterproofing membrane and bond it to the drain flange following the membrane manufacturer's instructions.
- Flood-test the membrane before tiling, to the membrane manufacturer's instructions and your local code.
- Tile toward the drain, keeping the cut tiles at the drain edge accurate; grout, then seal the movement joint at the frame.
- Fit the grate and hair trap and run a flow test: pour water on the far wall and watch where it goes.
For drawings to give your tiler, use the downloadable sections described in Shower Drain Construction Details: 4 CAD Sections.
Five Mistakes That Cost the Most
- Specifying length before the layout. Draw the tile and glass first; the drain follows.
- Counting only showerhead flow. Rain heads and body jets decide the drain size.
- Ordering before measuring body depth. Renovation floors are always shallower than expected.
- Building the slope into the tile bed. The slope belongs in the setting bed, under the membrane.
- Fixed grates and no hair trap. Cleaning access is a design requirement, not an accessory.
Ordering Checklist for an RFQ
Before you ask for a quote, write down: drain location and length, outlet size, position and orientation, floor build-up depth, tile thickness, grate pattern and finish, material grade, and quantity. The Custom Linear Shower Drain Specification Sheet turns that list into a fill-in form.
Melody Drain
We manufacture linear shower drains in 304 stainless steel (316 on request) in the Architect and Residential series, plus slotted, offset, V-pattern, narrow-slot and PVD-finish designs. Standard lengths run about 300-1000 mm, with custom lengths, outlet positions and finishes made to order through our OEM/ODM service. Send us the drain location, length, outlet position and floor build-up - or the drawing - and we will come back with a model and spec to review. Contact us or message us on WhatsApp.